A lightweight GraphQL (Part I)
(Also published at Fmp Tech Blog: http://tech.findmypast.com/lightweight-graphql/)
This post is inspired by a talk in the latest React London Meetup, Lightweight GraphQL. In Findmypast we use GraphQL and Relay in our new Titan architecture. I always felt like I had to go to the basics in order to understand what was going on in Relay. That talk gave me that and I wanted to share it with my friends. If after reading this post, you feel like you want to know more, you can watch the video.
This post is also inspired by Dan Abramov’s, You might not need Redux. In there, Dan goes to the basics of why he created Redux. In order to demonstrate it, he creates a really lightweight version of Redux as an example.
This post is not about why you need GraphQL. There are many good blogs talking about that topic (Why Graphql is the future, Graphql vs REST). I must confess though, many times I have asked myself the following:
Why the heck do we use GraphQL and Relay? I’ve been using Rest for many years, why do I need another tool if Rest does the job just fine…
For that reason I have prepared the following example. Hopefully you can change your point of view a little :D.
PhotoBooth
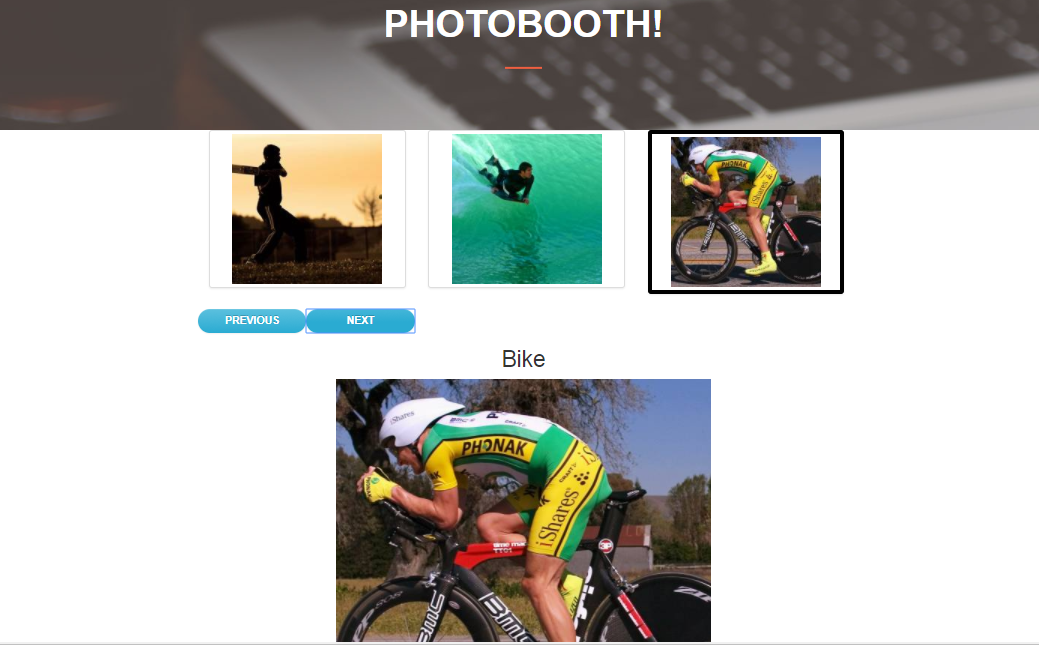
In Findmypast we have a Frontend Guild, this consists of a group of people interested in developing their Frontend skills. We sit together every week, we talk about all things Frontend for an hour, we decide what to learn next. We’ve been practicing using a case study, a Photobooth app. This is my code so far. And this is how it looks (sorry for the lack of style :D):
Let me show you some bits and bobs of the code.
This is the render function of my main app container:
class PhotoBooth extends Component {
    constructor(props){
        super(props);
        this.state = {
            currentPhoto: 1
        };
    }

    render() {
        return (
            <div>
                <Header />
                <Thumbnails
                    currentPhoto={this.state.currentPhoto}
                    photoSelected={this.photoSelected}/>
                <PhotoControls
                    previous={this.previous}
                    next={this.next}/>
                <Photo
                    currentPhoto={this.state.currentPhoto}
                    previous={this.previous}
                    next={this.next}/>
            </div>
        );
    }
}
We’ve got a Photo component where I render the big image:
import PhotoStore from './photo-store';

export default ({currentPhoto}) => {
    const photoMetadata = getCurrentPhotoMetadata(currentPhoto);
    return (
        <div className="row">
            <div className="col-lg-12">
                <h2>{photoMetadata.title}</h2>
            </div>
            <Image
                className="row"
                src={`${PhotoStore.baseUrl}/${PhotoStore.bigImage}/${photoMetadata.src}`}
                title={photoMetadata.title}/>
        </div>
    );
};

function getCurrentPhotoMetadata(currentPhoto) {
    const photo = PhotoStore.allPhotos[currentPhoto - 1];
    return {
        src: photo.src,
        title: photo.title
    };
};
And a Thumbnail component where we show all the small photos and we allow the user to select one of them to be displayed larger:
import PhotoStore from './photo-store';

export default ({currentPhoto, photoSelected}) => (
    <div className="col-lg-6 col-md-offset-3">
        <Grid>
            <Row>
                {PhotoStore.allPhotos.map((photo) => {
                    return (
                        <Col key={photo.title} xs={6} md={3}>
                            <Thumbnail
                                className={currentPhoto === photo.index ? "selected" : ""}
                                alt={photo.title}
                                src={`${PhotoStore.baseUrl}/${PhotoStore.thumbnailSize}/${photo.src}`}
                                onClick={() => photoSelected(photo.index)}/>
                        </Col>
                    )
                }, this)}
            </Row>
        </Grid>
    </div>
);
As you can see I have something called PhotoStore, but that is simply a list of harcoded photos that I take from Lorem Pixel:
const PhotoStore = {
    allPhotos: [
        {
            index: 1,
            title: "Baseball",
            src: "sports/1"
        },
        {
            index: 2,
            title: "Surf",
            src: "sports/2"
        },
        {
            index: 3,
            title: "Bike",
            src: "sports/3"
        },
    ],
    baseUrl: "http://lorempixel.com",
    thumbnailSize: "200/200",
    bigImage: "500/500"
};

export default PhotoStore;
PhotoBooth with our Github pictures
At the moment we are using Lorem Pixel pictures, but I thought, why don’t we make this a bit less boring and I show my colleagues’ avatars from Github. That would mean making a request to Github for every colleague, going through their metadata and getting their avatar.
Maybe not! Github has created a version of their api using GraphQL. With GraphQL we can request all the data we need from a consumer point of view, we define the shape of the data and it is delivered to us as JSON object. This is a massive win compare to classic REST, where in order to populate a page we need to make many requests to get all the data required to render. Let’s use Github GraphQL to see this in action.
Our first GraphQL query
Another great advantage of GraphQL is that the documentation is a living documentation, generated from the api itself. There is a tool called Graphiql where you can try GraphQL apis before using it. For Github we have it as well.
Let’s play a bit with Github’s graphiql in order to get some pictures. First of all let’s get Findmypast’s avatar:
query GetAvatarsQuery($login:String!) {
  organization(login:$login) {
    avatarUrl
  }
}

{
  "login": "findmypast"
}
Let’s go through the previous code:
- First of all we have the operation type, in this case it is a query.
- Then we have the operation name. It is optional for queries but it helps debugging.
- After that we specify that we want to query data from the organization type.
- We also need to pass some parameters so we can filter the data, in this case we send login. In GraphQL these are called arguments. Instead of using a harcoded value, in the example we have used a variable. Because GraphQL is strongly typed, we need to specify the field type in the argument.
This is the response we get back:
{
  "data": {
    "organization": {
      "avatarUrl": "https://avatars0.githubusercontent.com/u/9417510?v=4"
    }
  }
}
Let’s get some more data
Now let’s also get the avatars of last 3 members of Findmypast. With Rest that would mean hitting a different endpoint, forming a different request. With GraphQL I can just amend the previous request like this:
query($login:String!) {
  organization(login:$login) {
    avatarUrl
    members(last: 3) {
      nodes {
        name
        avatarUrl
      }
    }
  }
}
That is, I tell the api: in addition to the organization’s avatar, give me the name and avatar of the last 3 members of the organization. I obtain this:
{
  "data": {
    "organization": {
      "avatarUrl": "https://avatars0.githubusercontent.com/u/9417510?v=4",
      "members": {
        "nodes": [
          {
            "name": "Dennis Ideler",
            "avatarUrl": "https://avatars2.githubusercontent.com/u/497458?v=4"
          },
          {
            "name": "Yosuf Ali",
            "avatarUrl": "https://avatars3.githubusercontent.com/u/10884239?v=4"
          },
          {
            "name": "Juan Flores",
            "avatarUrl": "https://avatars1.githubusercontent.com/u/11361723?v=4"
          }
        ]
      }
    }
  }
}
I find this way of querying an api highly expressive:
I’m more worried about what data I want than how I have to obtain it.
Consuming GraphQL data programmatically in a React app
Execute GraphQL programmatically
You can run that same GraphQL query in your favourite browser, go to the Console and type the following. We’ll be using window fetch like this:
window.fetch("https://api.github.com/graphql", {
  method: "POST",
  headers: {
    "Content-Type": "application/json",
    "Accept": "*/*",
	"Authorization": "bearer --YOUR PERSONAL TOKEN--"
  },
  body: JSON.stringify({
    query: "query($login:String!) { organization(login:$login) { avatarUrl members(last: 3) { nodes { name avatarUrl } } } }",
    variables: {
      "login": "findmypast"
    }
  })
})
.then(response => response.json())
.then(json => console.log(json))
(In order to communicate with Github Graphql you need to generate a Personal token, follow instructions here).
That former code is running a post operation to Github’s GraphQL server. In the body, we provide exactly the same query and parameters that we used in Graphiql.
Now let’s move that into a function that we can execute in our code:
function executeGraphQLQuery(query, variables = {}){
  return window.fetch("https://api.github.com/graphql", {
    method: "POST",
    headers: {
      "Content-Type": "application/json",
      "Accept": "*/*",
      "Authorization": "bearer --YOUR PERSONAL TOKEN--"
    },
    body: JSON.stringify({
      query: query,
      variables: variables
    })
  })
  .then(response => response.json());
}

export default executeGraphQLQuery;
Connect your GraphQL queries to React components
Now let’s use our new function to build a High Order component (HOC). This will allow us to decorate our React components with the possibility to get data from GitHub:
import React from 'react';
import executeGraphQLQuery from './execute-graphql';

const withGraphQL = (query, { variables } = {}) => Component =>
  class extends React.Component {
    state = { loading: true };

    async fetchData(){
      try {
        const json = await executeGraphQLQuery(query, variables);
        this.setState({
          loading: false,
          error: null,
          data: json.data
        });
      } catch(e){
        this.setState({
          loading: false,
          error: e
        });
      }
    }

    componentDidMount(){
      this.fetchData();
    }

    render(){
      return <Component {...this.props}
                loading={this.state.loading}
                data={this.state.data}
                error={this.state.error} />;
    }
  }

export default withGraphQL;
When the HOC is mounted it goes and fetches data by using the previous function. Since the function is asynchronous, we use the nice coming ES7 syntax with async/await and try/catch. After we get the data we update the HOC state and pass it to the rendered Component.
By using this High order component, any Component can get data from GitHub, it will be injected as props.
Using withGraphQL in our Photo Booth:
Let plug this into some of our component. Here is our Photo component decorated with the HOC, we tell it to get the name and avatar of the first 3 members of Findmypast:
const query = 'query($login:String!) { organization(login:$login) { members(first: 3) { nodes { name avatarUrl } } } }';
const params = { variables: {"login": "findmypast" }};

export default withGraphQL(query, params)(Photo);
This is great in the sense that you can see the data requirements together with the component being rendered. Now the Photo component will get that data as props:
const Photo = ({currentPhoto, data}) => {
    if(!data) return null;

    const photoMetadata = getCurrentPhotoMetadata(currentPhoto, data.organization.members.nodes);
    return (
        <div className="row">
            <div className="col-lg-12">
                <h2>{photoMetadata.title}</h2>
                <Image
                    className="row"
                    src={photoMetadata.src}
                    title={photoMetadata.title}/>
            </div>
        </div>
    );
};

function getCurrentPhotoMetadata(currentPhoto, photos) {
    const photo = photos[currentPhoto];
    return {
        src: photo.avatarUrl,
        title: photo.name
    };
};
Please notice that for now while data is undefined, I don’t render anything. Otherwise the data comes in data.organization.members.nodes.
Let’s take a look at the Thumbnail component using GraphQL:
import React from 'react';
import {Grid, Row, Col, Thumbnail} from 'react-bootstrap';
import withGraphQL from '../graphql/with-graphql';

const Thumbnails = ({currentPhoto, photoSelected, data}) => {
    if(!data) return null;

    return (
        <div className="col-lg-6 col-md-offset-3">
            <Grid>
                <Row>
                    {data.organization.members.nodes.map((photo, index) => {
                        return (
                            <Col key={photo.name} xs={6} md={3}>
                                <Thumbnail
                                    className={currentPhoto === index ? "selected" : ""}
                                    alt={photo.name}
                                    src={photo.avatarUrl}
                                    onClick={() => photoSelected(index)}/>
                            </Col>
                        )
                    }, this)}
                </Row>
            </Grid>
        </div>
    )
};

const query = 'query($login:String!) { organization(login:$login) { members(first: 3) { nodes { name avatarUrl } } } }';
const params = { variables: {"login": "findmypast" }};

export default withGraphQL(query, params)(Thumbnails);
In the bottom part you can see how we decorate Thumbnails with the HOC. We provide the exact same query as before. It means that we can loop through the organization members and render a Thumbnail for each of them.
And this is how the app looks with these changes, my random PhotoBooth turned into a Findmypast Photobooth!

This is it for now. With this basic example we have been able to query data from Github by using GraphQL and render it in our Photobooth React app. We haven’t used Relay but we have understood how Relay queries data from GraphQL servers. Relay hides the nitty-gritty aspects for us so we can focus in our application.
You have the full code of the example in this link.
In the next blog post we will continue developing our Lightweight GraphQL. We will include mutations, fragments and much more so that we can understand what Relay is doing for us.